Are you ready to embark on a thrilling DIY journey that combines functionality and aesthetics? The project plan for crafting a media cabinet with cane webbing panels is the perfect venture for enthusiasts looking to enhance their living spaces. In this comprehensive guide, we’ll explore the step-by-step process, materials needed, design considerations, and more.
Introduction
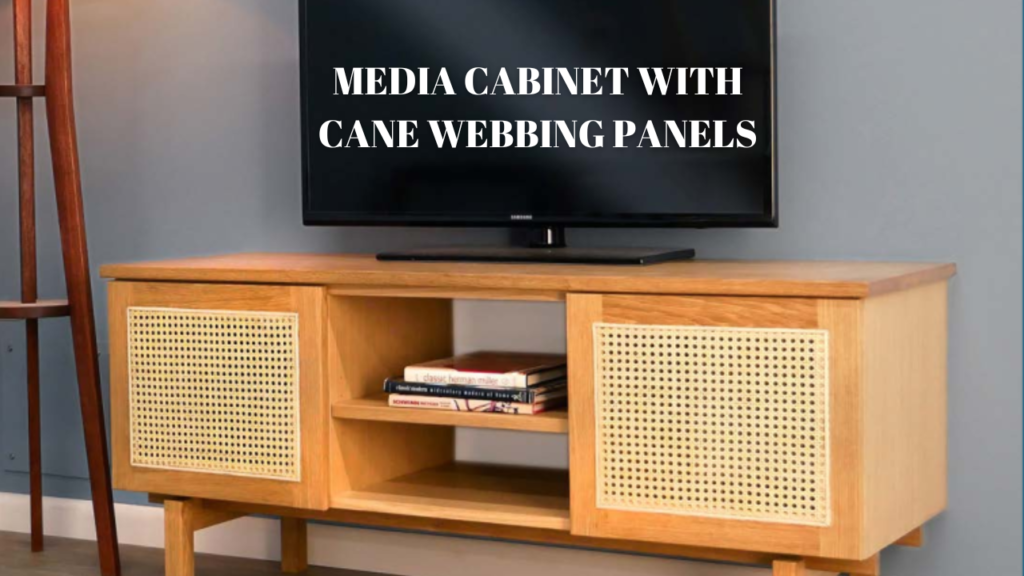
Welcome to the world of bespoke furniture! The media cabinet with cane webbing panels is not just a functional storage unit; it’s a statement piece that adds sophistication to any room. As we delve into this project, you’ll discover the joy of creating your own furniture and the satisfaction of enjoying a unique piece tailored to your style.
Materials Needed
To kickstart your project, gather the following materials:
- Solid wood boards
- Cane webbing sheets
- Wood glue
- Screws
- Wood finish
- Paint (optional)
Each material plays a crucial role in achieving the desired look and functionality of your media cabinet.
Tools Required
Equip yourself with the necessary tools:
- Saw
- Drill
- Screwdriver
- Sandpaper
- Clamps
These tools are essential for a smooth construction process, ensuring precision and efficiency.
Design and Measurements
Before diving into construction, carefully plan the design and measure your materials. This step is crucial for avoiding mistakes and ensuring your media cabinet fits seamlessly into your space.
Step-by-Step Construction
Let’s break down the construction process:
- Assemble the Frame: Begin by constructing the frame using solid wood boards.
- Attach Cane Webbing: Carefully affix the cane webbing panels to create a visually appealing pattern.
- Secure the Back: Add stability by securing the back of the cabinet.
- Install Shelves: Customize the interior by adding shelves to accommodate your media devices.
- Finish and Paint: Apply a suitable finish to enhance the wood’s natural beauty, and paint if desired.
Benefits of Cane Webbing Panels
Discover the benefits of using cane webbing panels:
- Aesthetic Appeal: Cane webbing adds a touch of elegance and warmth to your furniture.
- Durability and Versatility: Enjoy furniture that withstands the test of time while seamlessly blending with various decor styles.
Finishing and Painting
The finish is not just about aesthetics; it’s about protection. Choose a finish that complements your style, and if you wish, add a splash of color with paint.
Maintenance Tips
Keeping your media cabinet in top condition is simple:
- Regular Cleaning: Dust the cane webbing regularly.
- Avoid Moisture: Protect the wood from moisture to prevent warping.
Styling and Placement
Integrate your media cabinet effortlessly into your home:
- Versatile Styles: From modern to rustic, the media cabinet complements various interior styles.
- Ideal Placement: Consider placing it as a focal point in your living room or bedroom.
Cost Considerations
Estimate your budget wisely:
- Quality vs. Cost: Invest in quality materials where it matters while finding cost-effective alternatives for others.
DIY vs. Professional Installation
Choose the approach that suits you:
- DIY: Enjoy the satisfaction of crafting your furniture.
- Professional: Save time and ensure precision by hiring a professional.
Troubleshooting Common Issues
Anticipate challenges and find solutions:
- Uneven Panels: Adjust the tension while attaching cane webbing.
- Warping Wood: Use clamps during assembly to prevent warping.
Customer Testimonials
Real experiences speak volumes:
- “I love the uniqueness of my media cabinet!”
- “The instructions were clear, making the construction process enjoyable.”
Project Variations and Customizations
Get creative with variations:
- Colorful Accents: Paint the frame in bold colors.
- Open Shelving: Replace solid panels with open shelves for a modern touch.
Future Trends in Media Cabinets
Stay ahead with emerging trends:
- Sustainable Materials: Look for eco-friendly options.
- Innovative Designs: Explore new shapes and configurations.
Conclusion
Crafting a media cabinet with cane webbing panels is not just a DIY project; it’s an expression of your creativity. From the initial design phase to the final coat of paint, this venture allows you to personalize your furniture. Embrace the journey and enjoy the satisfaction of having a unique and functional piece in your home.
FAQs
- Can I use different types of wood for this project?
- Absolutely! Experiment with different woods to achieve varied looks.
- Is cane webbing easy to clean?
- Yes, a soft brush or vacuum cleaner can easily remove dust from cane webbing.
- How long does it take to complete this project?
- The timeframe varies but plan for a weekend or two for a leisurely pace.
- Can I paint the cane webbing for a customized look?
- While possible, it’s recommended to embrace the natural beauty of cane.
- Is professional installation worth the cost?
- It depends on your skill level and the precision you desire; both DIY and professional options have their merits.
- DIY media console
- Cane webbing furniture
- Handmade media storage
- Wooden cabinet tutorial
- Customized home decor
- DIY furniture projects
- Interior design ideas
- Creative storage solutions
- Home crafting inspiration
- Unique DIY cabinet design